I thought I might have a wee break from the building after seeing Daoirí Farrell’s new bouzouki safely off a month or so back. He seems delighted with it and sent me this short video a few weeks ago.
Many thanks to Daoiri for the use of this video. Click here for more information about Daoiri’s music.
But it wasn’t long before I wanted to get back into the shed and make a start on the next one. This will be a sort of prototype instrument as I’ve been keen to try out a couple of ideas.
Throughout my building career I’ve always been keen to try out new ideas and build techniques, how do you progress as a maker if you just keep on doing the same thing. If, when you try something new and the idea works, that’s a great result. If it doesn’t, then you have to scrap the idea, think again and move on. It’s all part of the learning process and all part of the joys of lutherie!
So, I guess I’m about halfway into the build. It’s going to be a standard 650mm scale length SBB and the finished instrument will look pretty much the same as previous ones. The basic construction process will be identical as well — so, make the neck first and fit into the build jig. The neck is a one-piece construction with integral block (so no dovetail or mechanical neck joint), two carbon fibre rods and 2-way truss rod. This method of construction has definite tonal advantages and by omitting the neck join, energy is conserved greatly improving tone and sustain. It means that a different way of building the body is required, possibly more complicated but it’s a method I’ve been using for over 30 years and it works for me!
This instrument also has a neck backstrap in rosewood. This is a technique which is gaining in popularity and makes for a much stronger headstock, looks great and also gives the player somewhere to park a capo. Once the neck is ready, it goes into the build jig with the correct geometry so the neck angle is correct for the bridge/saddle height above the top. Then the end block is fitted into the jig, the sides are thicknessed and bent up and glued into the neck and end block. Then make the back, profile the sides and fit the back and once dry, trim away the excess and remove the body from the jig. That’s the stage that I’m at here:
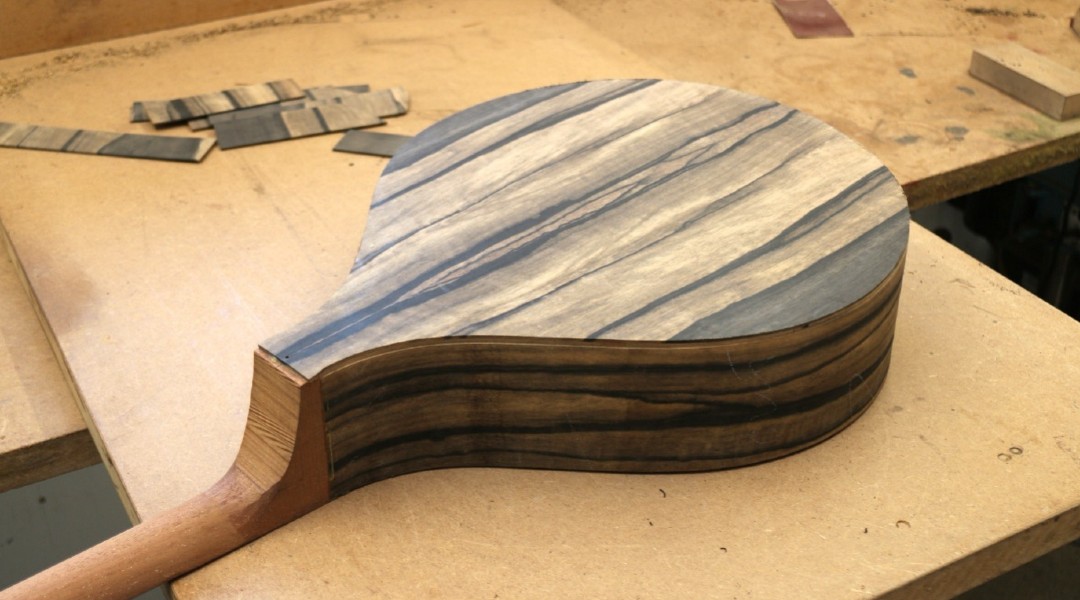
So, the first idea is something I tried out on Daoirí’s — an idea to stiffen up the sides without adding too much weight.
The idea of heavy or rigid sides is not a new one, many guitar builders use the technique and it’s something I tried when I was building the ‘Black Edition’ instruments a few years back. The idea is that the vibration / energy from the strings is transferred into the top through the bridge, but then the potential of that energy is maximised by staying in the top and doesn’t leach out into the sides, making for a more toneful and responsive instrument that projects better and has more sustain.
For those BE instruments I used 3 layers, typically the outer layer was rosewood, then a middle layer of rosewood at 90 degrees, then a third, inner layer of maple or ebony. The sides effectively became a thick, very expensive plywood about 7mm thick. It certainly worked and the sides became incredibly stiff, but to be honest, it was a pain in the arse to build and also made for quite a heavy instrument.
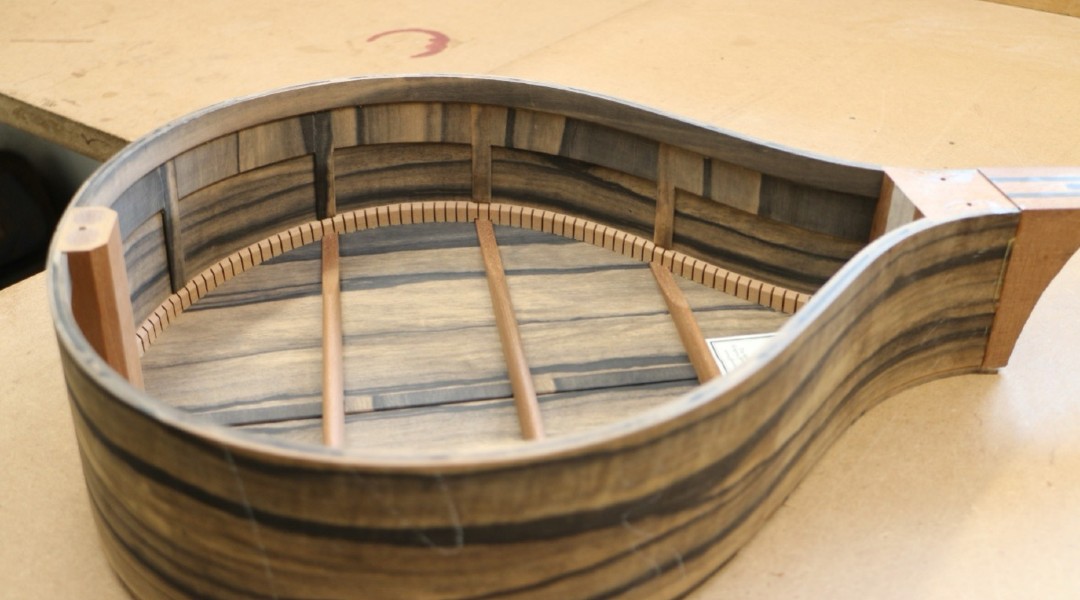
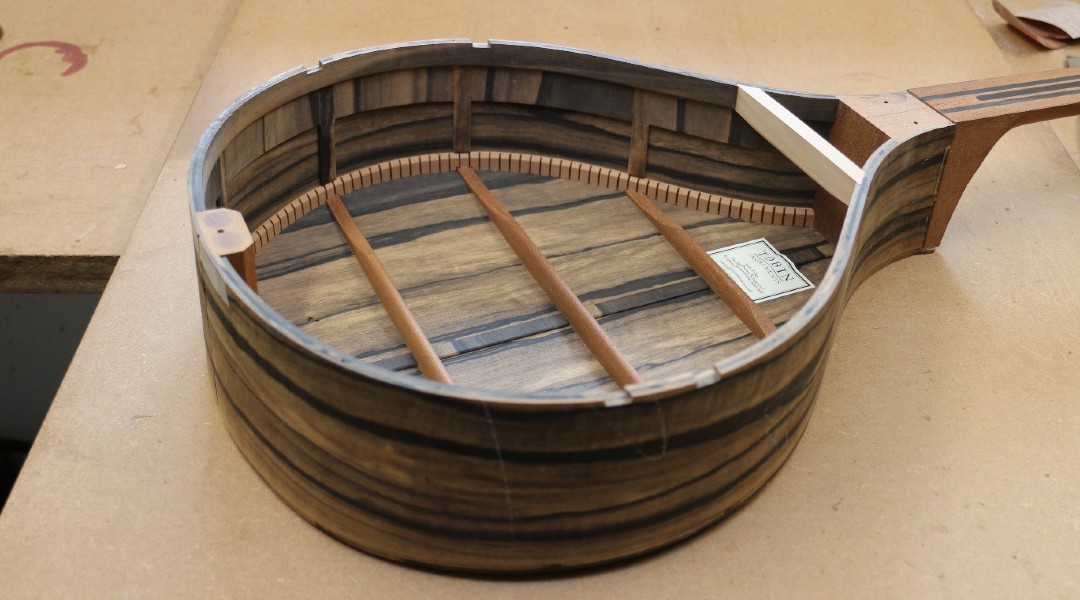
I wanted to revisit the idea to try and get some of the benefits of rigidity but without the expense, extra labour and weight, so I came up with this, which I think ticks all of the boxes:
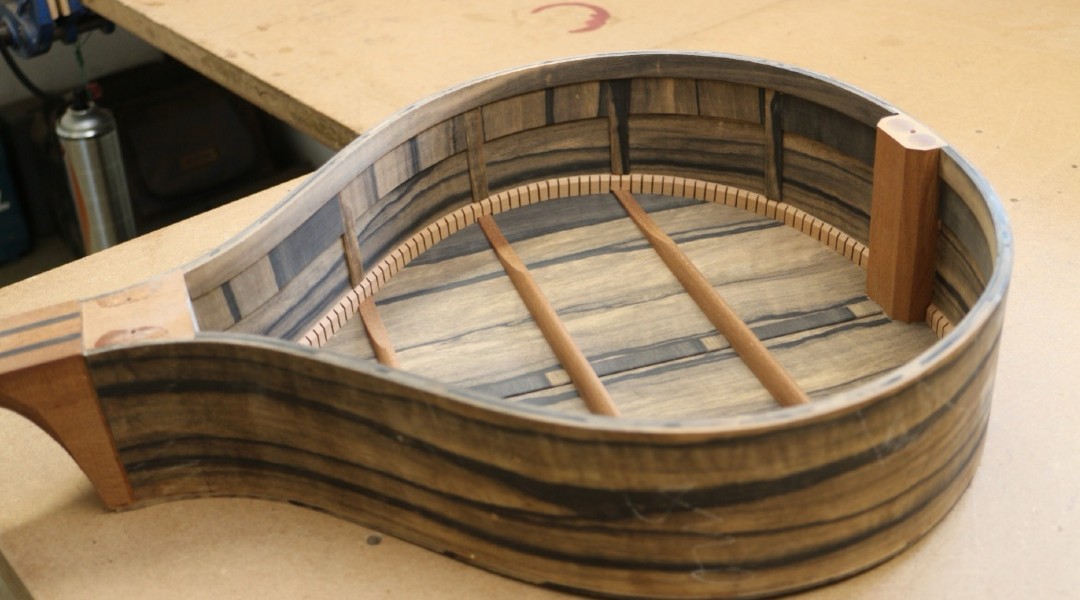
We have an outer layer of (in this case) African Ebony, then using the offcuts from the back and sides, a middle 40mm deep layer at 90 degrees and then an 18mm deep lining. All layers are around 2.1mm thick giving a final thickness of the sides at just over 6mm, and I think it works pretty well. The sides are significantly stiffer, not much additional weight added and not much more time-consuming to complete.
So now the instrument is ready for the top which I’ll be working on over the next few days…
OK, I’ve got the top finished now and it’s ready for fitting to the body. I’ve used a European Spruce for the top, the very best grade I can find, so an even grain, perfectly quarter sawn, light in weight, but most importantly, as stiff as possible. The top is the component in an instrument that has to do the most amount of work, it’s where nearly all of the tone, character and projection is generated so it pays dividends to use the very best wood you can find.
On previous instruments I would thickness the top to around 3mm at the centre and then feather the edges gradually down to around 2.1mm depending on the stiffness of the piece of wood. Once the top is fully braced I will also ‘voice’ the top by gradually removing wood from the main braces until I have the response and tone that I’m looking for, but without compromising the strength of the main braces which have to withstand the huge compression force of the strings which are trying to push the bridge into the body.
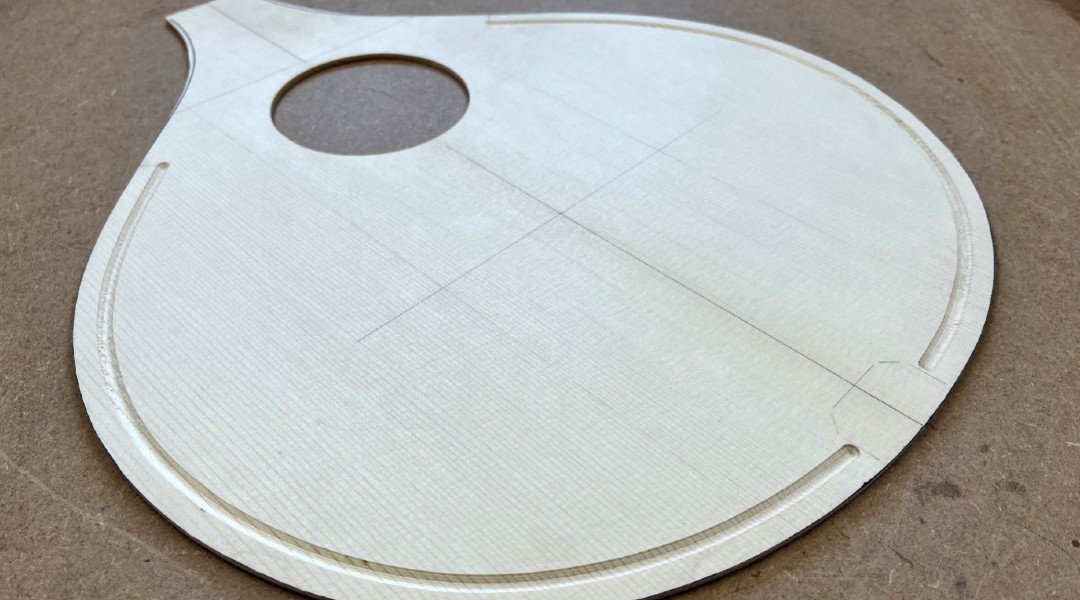
On this instrument though I’m trying something new. The bracing design is staying the same, but I’m looking at ways to increase the responsiveness of the top but without compromising the strength of the braces. So I’ve routed out a shallow channel on the inside of the top very close to the edge. This will act as a sort of hinge, slightly weakening the top around the edge and hopefully allowing the top to vibrate more freely. The pressure from the strings will be mostly taken by the main braces so there shouldn’t be any deformation in the top from the routed channel.
Here’s what it looks like before bracing:
And fully braced:
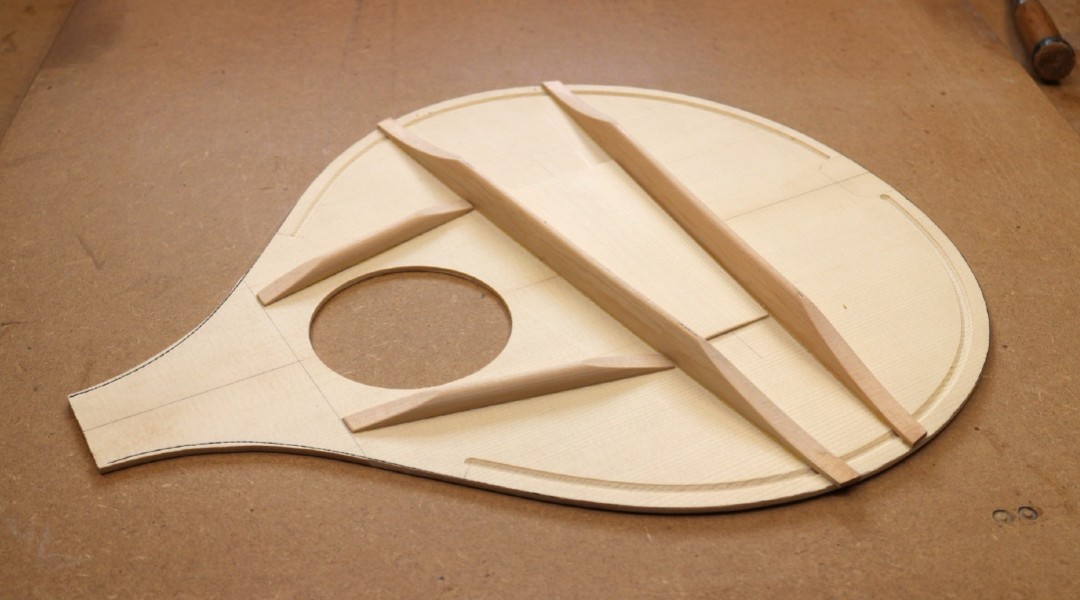
The top is finished now and is ready for fitting to the body. Just a couple of quick jobs first, though. The fingerboard brace needs fitting and the sides need to be notched to take the ends of the main top braces.
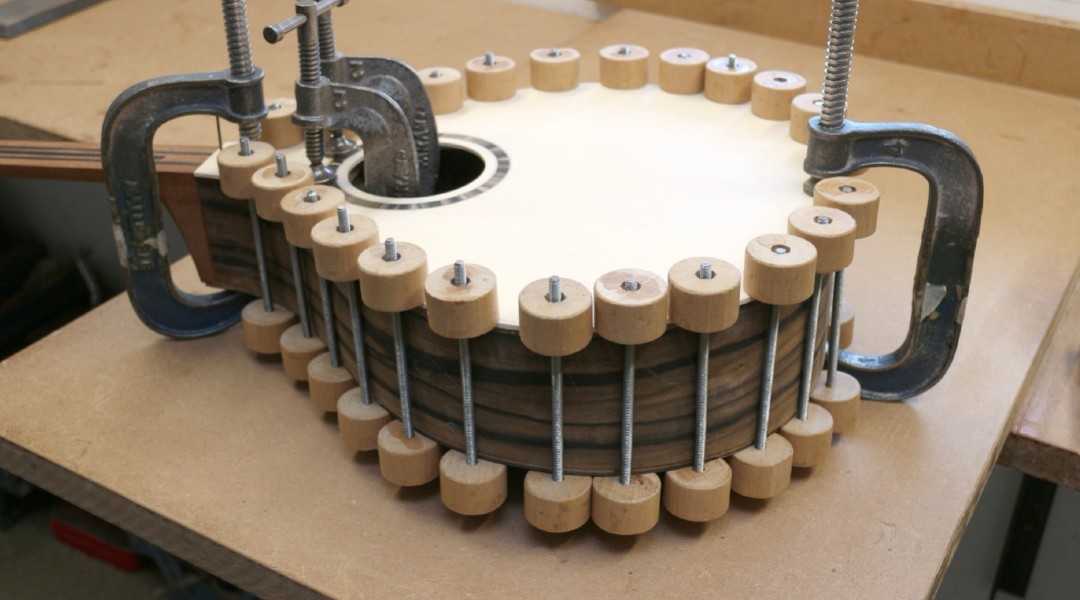
Here the top has been fitted and clamped down while the glue dries.
The remaining stages in the construction are fitting the purfling and bindings to the body then the fingerboard is fitted, profiled and fretted. Then a big clean down to get it ready for spraying and assembling.
More soon…